If you don’t yet know what is Excel VBA, check this post out.
When you ask a programmer what is the most important aspect of programming, they would probably say “For Loop”. Through specifying the instruction to handle one item, For Loop helps us apply the same set of instructions to many items at once!
In this article, I will show you how to write efficient For Loop in Excel VBA. Your coding speed will not be the same after reading the article.
What exactly is a For Loop?
For example, imagine we are making 20 cups of coffee for our guests. Let’s see how it works with and without For Loop:
| Without For Loop | With For Loop |
|---|---|
| Take Cup 1 from cupboard Pour coffee inside Cup 1 Add a biscuit next to Cup 1 Serve Cup 1 to Guest 1 Take Cup 2 from cupboard Pour coffee inside Cup 2 Add a biscuit next to Cup 2 Serve Cup 2 to Guest 2 | For Each Guest ( 1 to 20 ): Take Cup n from cupboard Pour coffee inside Cup n Add a biscuit next to Cup n Serve Cup n to Guest n Next |
Through this little example, you’ll see how a For Loop transform 20 instructions in a single one, repeating instruction.
In Excel, we can achieve the same type of time-saving when we apply a For Loop in Excel VBA.
How a For Loop work in Excel
In Excel VBA, a very popular use of a For Loop is to perform some calculations on each and every row, then based on the row number, provide a certain output.
Now this may seem abstract, but let’s look at a straight-forward example below:
Option Explicit
Sub SimpleForLoop()
    ' Declare our looping variable
    Dim i

    ' Start a for loop
    For i = 1 To 10
        ' On row 1, print 2; on row 2, print 3,...
        Range("A" & i) = i + 1
    Next
End Sub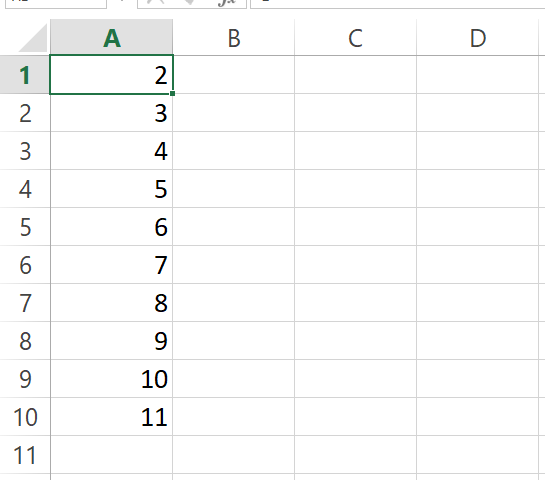
This simple For Loop does one thing – for every cell in Column A from A1 to A10, output the row number + 1 into that cell (i.e. Range(“A” & i ) = i + 1).
Let’s look at the output. We see that after running this VBA code, we have “2” in A1, “3” in A2, …, and 11 in “A10”. This is exactly why a For Loop is useful: instead of typing in manually, we can specify the instruction on treating the i-th cell, and Excel VBA will do the heavy-lifting for us.
There are a couple of ways to write For Loop in Excel. One such way is what we described just now, but as you may have guessed, this is actually the least efficient one. Let’s learn about a couple of other ways to write better For Loop in Excel!
Alternative #1: Use a For Each Loop
For Each Loop is a next level of For Loop that is more readable. It is particularly useful if you are working with cells where the row number doesn’t matter.
Let’s take a look at the following example, where we generate a random number for every cell in A1:C10. Note that this random number is independent with the row number or column number.
Option Explicit
Sub ForEachLoop()
    Dim rng, loop_cell
    ' Use cell A1, A2, ... C10 in our loop
    Set rng = Range("A1:C10")

    For Each loop_cell In rng
        ' Read as "for every cell in the given range"
        loop_cell.Value = Rnd()
    Next
End Sub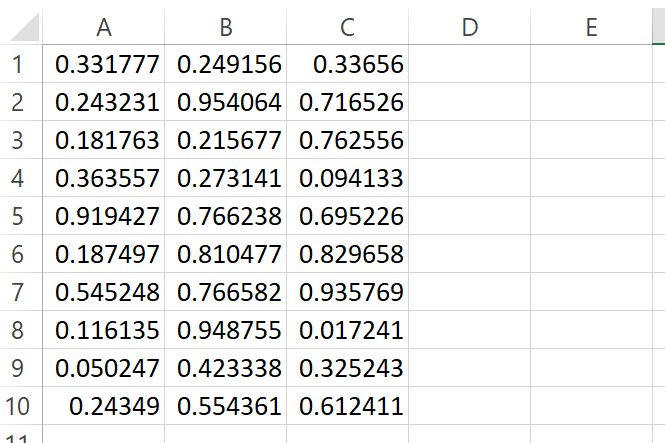
Using a “For Each” loop, not only is the iteration more clear and concise in Excel VBA, it is actually a essential skills when dealing with more advanced Excel VBA problems, like looping in a VBA UserForm and some other more interesting objects.
Another benefit is that while in a traditional For Loop, you can usually only loop over a specific column, by using a For Each loop, you can actually loop over rows and columns. As in the example, only using a For Each loop on A1:C10, we can generate a random number in each of those cell, instead of writing a nested for loop.
This is particularly useful if you have a small area where you want to apply the same treatment (e.g. a random number, a color change).
Alternative #2: Use a in-memory For Loop
When dealing with a lot of data and they are nicely formatted as a table in Excel, an in-memory for loop can achieve more than 10x faster processing and handling than a traditional For Loop we mentioned above!
The working principle here is that, instead of asking Excel VBA to write a number to the worksheet on every iteration, we actually ask Excel VBA to first “load” all the data to the RAM of the computer, perform the calculation, and then “paste” the data back into the worksheet.
Let’s look at 2 codes which illustrates the point.
Option Explicit

Sub SlowForLoop()
    Dim startTime, noOfRV, i
    startTime = Now()
    noOfRV = 500000

    ' Generate 500,000 random numbers
    For i = 1 To noOfRV
        Range("A" & i) = WorksheetFunction.Norm_S_Inv(Rnd())
    Next

    MsgBox "Slow For Loop Takes " & Round((Now() - startTime) * 24 * 60 * 60, 2) & " seconds"
End Sub

Sub FastForLoop()
    Dim startTime, noOfRV, i
    startTime = Now()
    noOfRV = 500000

    ' Create an in-memory array
    ReDim arr(1 To noOfRV, 1 To 1)
    ' Generate 500,000 random numbers
    For i = LBound(arr, 1) To UBound(arr, 1)
        arr(i, 1) = WorksheetFunction.Norm_S_Inv(Rnd())
    Next
    ' Paste the in-memory array to the worksheet
    Range("A1:A" & noOfRV) = arr

    MsgBox "Fast For Loop Takes " & Round((Now() - startTime) * 24 * 60 * 60, 2) & " seconds"

End Sub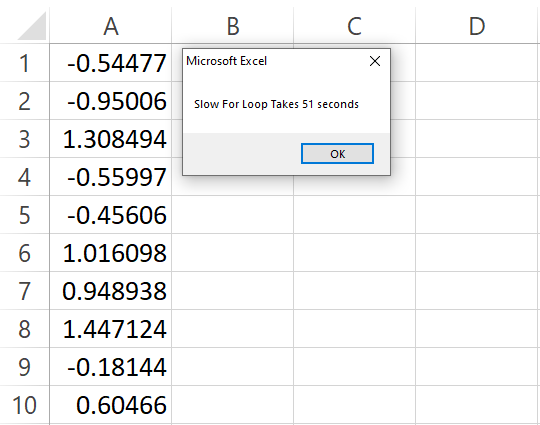
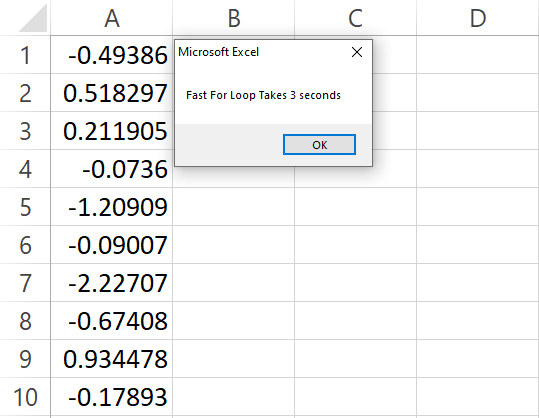
In this example, we generate 500,000 random numbers (which is quite a tedious process for the CPU), and compare the methods we used in SlowForLoop against FastForLoop.
The difference is that in FastForLoop, we create an in-memory array to loop instead of writing the result to the worksheet one by one.
Concept
Here is an analogy tying back to our coffee-making example: Imagine that instead of serving the guest one-by-one after making one coffee, we make 20 coffee and serve them simultaneously to all of our 20 guests. This is essentially the same as what we do by creating an in-memory array.
As in the image above, the FastForLoop method is faster than SlowForLoop by 48 seconds (3 seconds vs 51 seconds), and the difference increases exponentially, i.e. for really big tables, you’d love to use FastForLoop instead of SlowForLoop.
Bottomline
Just like working with Excel formula, and learning to do =SUM(A1:A10) instead of =A1+A2+…+A10, learning to write For Loop efficiently is definitely something you’d wish you know when you are suddenly working with large dataset.
Check out these articles if you want more tips and tricks on Excel VBA writing!


