Imagine this – When your boss open your Excel file in a client meeting, he accidentally unhide some rows containing confidential data. How disastrous.
What else could happen if you fail to delete hidden rows in Excel? You could have made the Excel workbook larger in data size and waste some calculating effort. This can slower your workbook. You could have mess up some calculations because you include cells that should be excluded from the calculations.
Deleting hidden rows can be crucial. However, it is not as easy as it sounds. If you happen to have a large Excel file with hundreds of Excel worksheet, you may spend days and nights checking if there is any hidden rows left. Still, you cannot say for sure that every hidden row is properly deleted.
In this article, I will show you how to delete hidden rows in Excel. It doesn’t matter if your workbook contains hundreds of worksheets.
If you have the following questions, I suggest you reading this until the end.
- How to delete hidden rows in Excel?
- How to delete invisible rows in Excel?
- How to delete hidden rows from entire Excel workbook?
You might also be interested in Excel Split Long Text into Short Cell Without Splitting Word.
Delete hidden rows in Excel by “Inspect documents”
In this example, we are going to show you how to delete hidden rows by an Excel feature called “Inspect documents”.
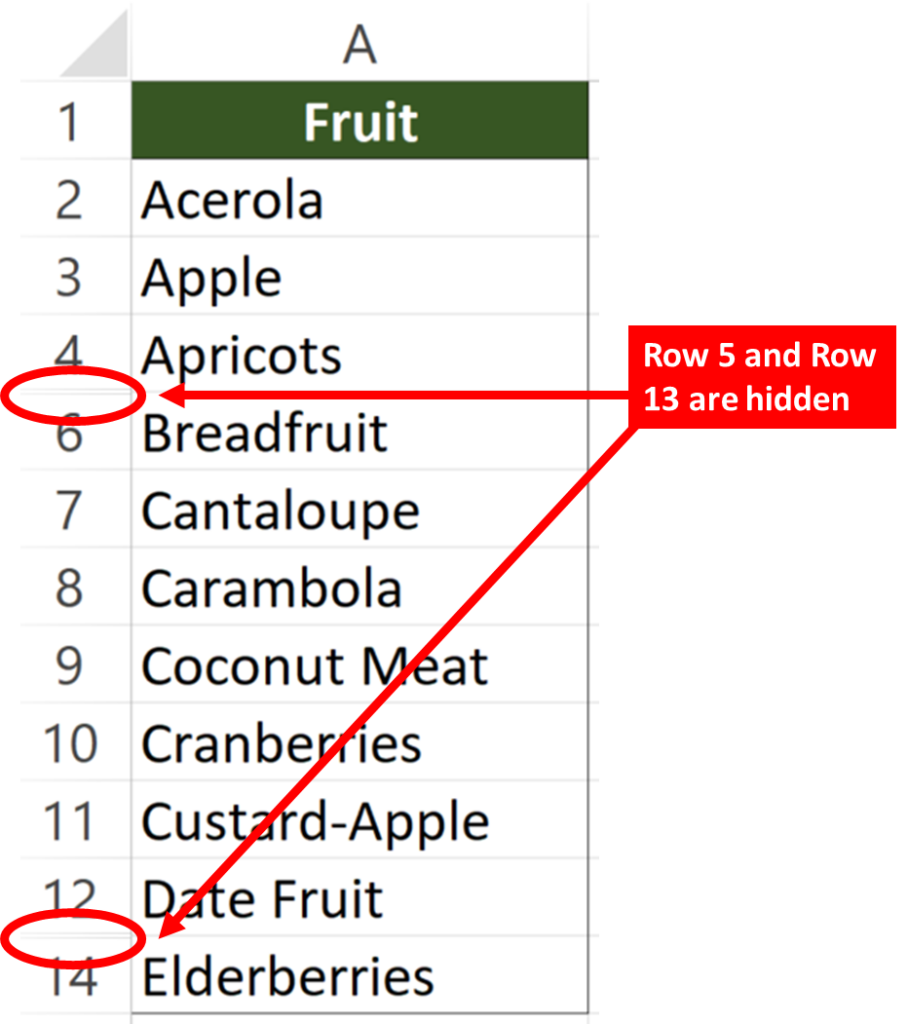
As you can see from the below example, the content of the fruit list seems to be the same.
However, when you look at it carefully, you will realise the row number is different.
Cell A10 in the first fruit list contains “Cranberries” while cell A10 in the second fruit list contains “Custard-Apple”.
Row 5 and row 13 is missing from the first fruit list. In other words, two rows are hidden in the first fruit list.

What we would like to do
To delete hidden rows from the entire workbook
You might also be interested in How to prevent duplicate entries in Excel?
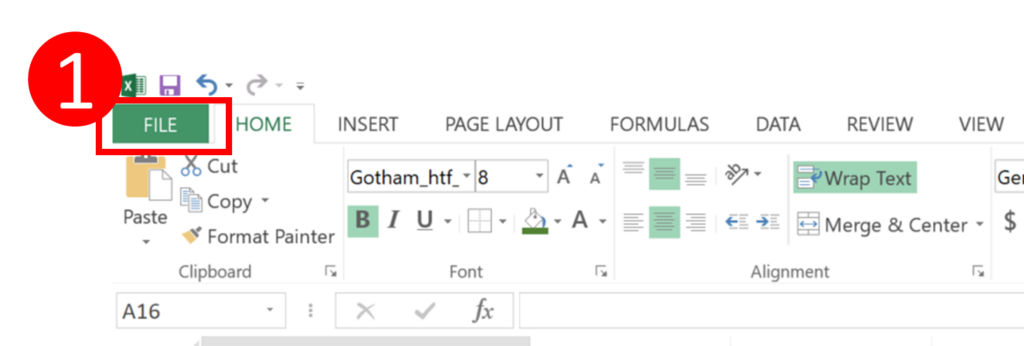
Step 1: Select “File” tab from the ribbon
“File” tab is undermined among Excel users. You can explore it a bit if you are curious..
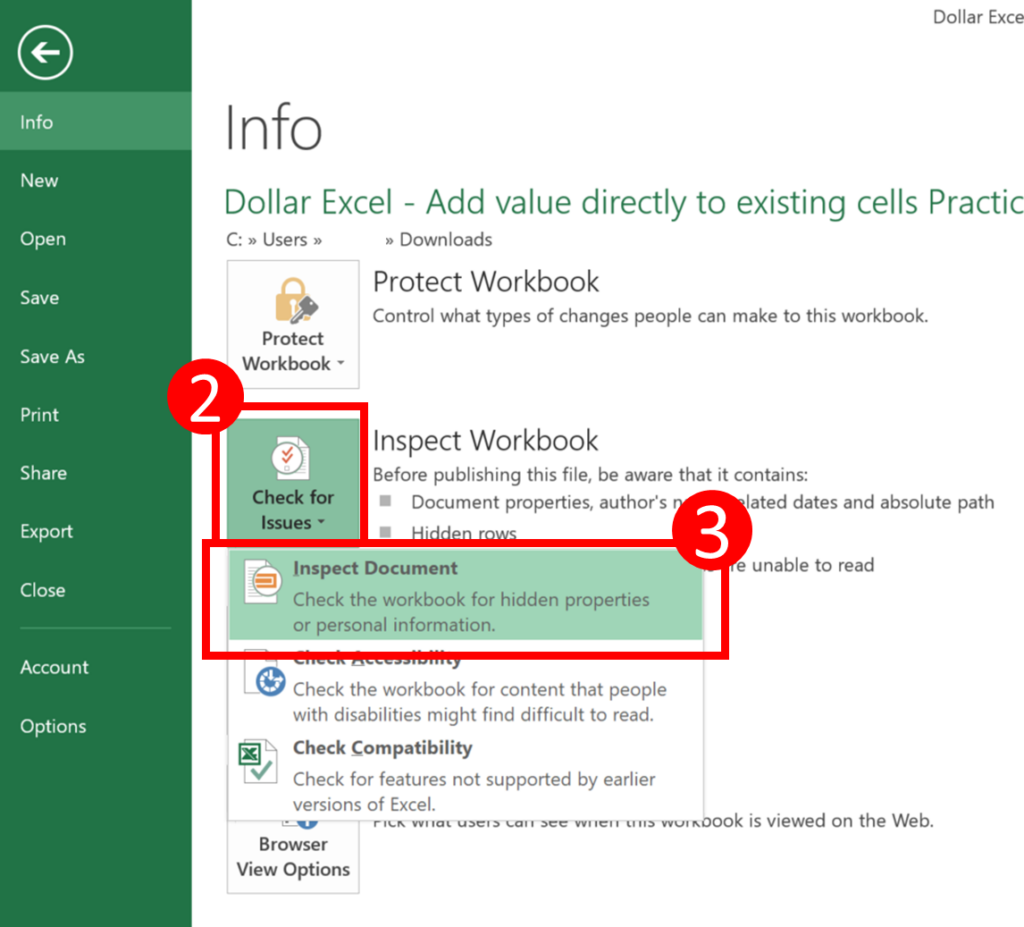
Step 2&3: Press “Check for Issues” and select “Inspect Document”
“Inspect Document” checks the workbook for hidden properties or personal information.
Step 4: Press “Yes” to save the Excel file
Pressing “Yes” means that the Excel file will be saved. You can press “No” if you don’t want to save it by now.
Normally, I just select “Yes”. If it does remove data that I will like to keep, I will just close the Excel file and open it again.
If you pressed “No” and it removed data you actually need, you will close and reopen the file and lose some unsaved changes.

You might also be interested in Edit The Same Cell In Multiple Excel Sheets
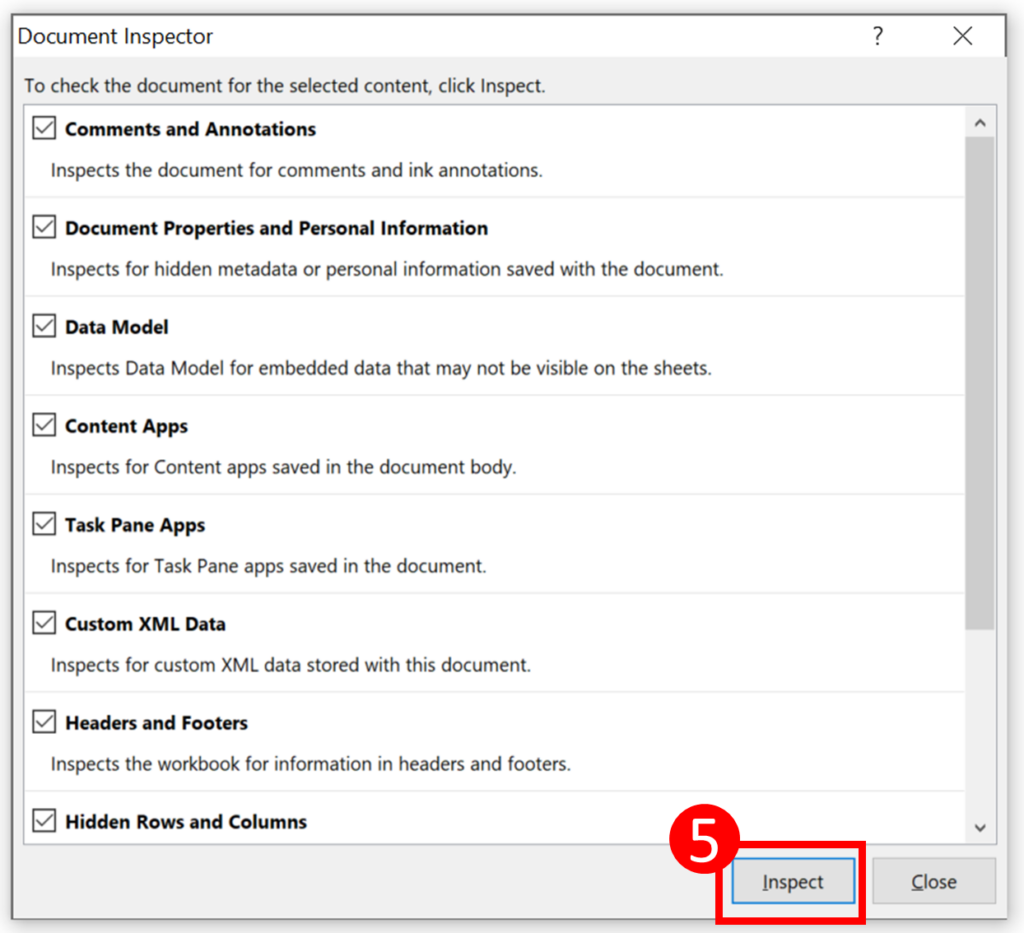
Step 5: Press “Inspect”
The “Document Inspector” window should appear.
You are free to check and uncheck the boxes to select content that you would like to inspect.
For sake of convenience, I usually don’t make changes to the box.
Instead, I leave all boxed checked and simply pressed “Inspect”.
Step 6: Scroll down until you see “Hidden rows and columns”
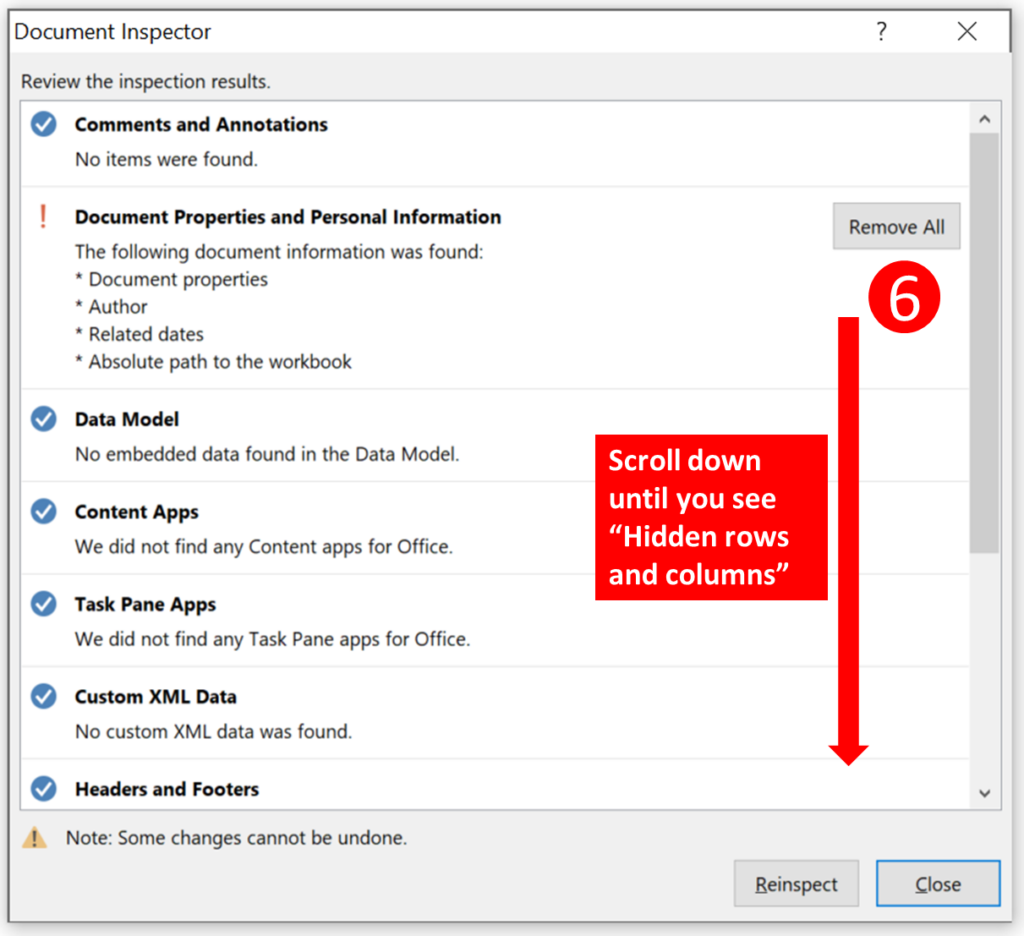
You should find “Hidden Rows and Columns” near the bottom.
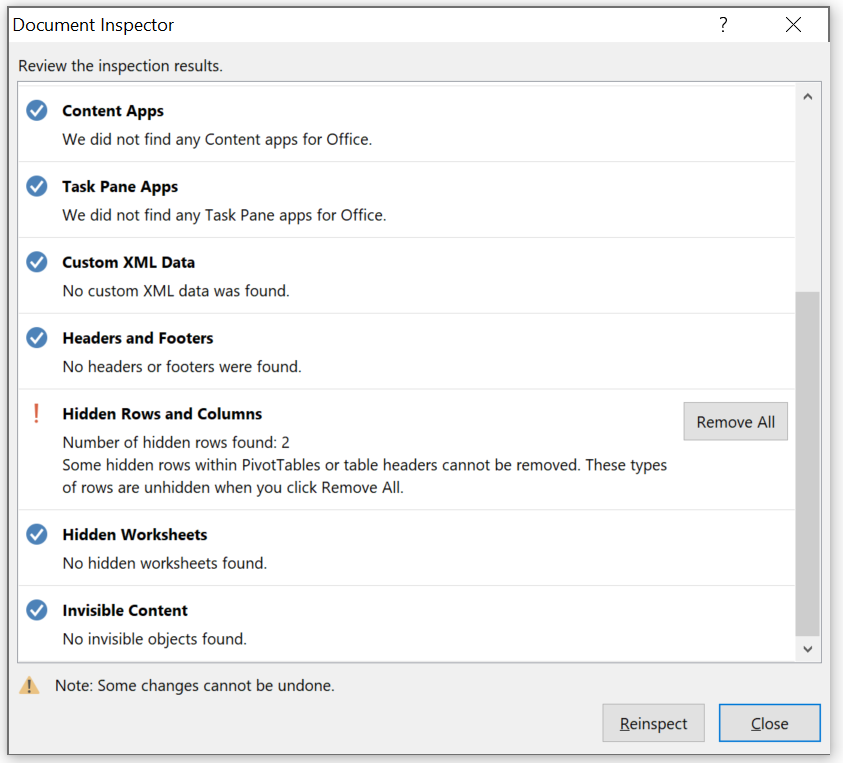
Step 7: Press “Remove All”
Under the “Hidden Rows and Columns”, you will find some relevant information.
It shows that number of hidden rows in my workbook is two in total.
It also let you know that hidden row within PivotTable or table headers cannot be removed. I found it very useful. Since rows are hidden in PivotTable mostly for data presentation purpose, we wouldn’t want those to be deleted.
Once you pressed “Removed all”, hidden rows and columns will be removed. On the contrary, hidden rows within PivotTables or table headers will be unhidden and become visible again. Those two actions come in pair. If you don’t want to unhide hidden rows within PivotTables or table headers, you probably need to find another way to do this.

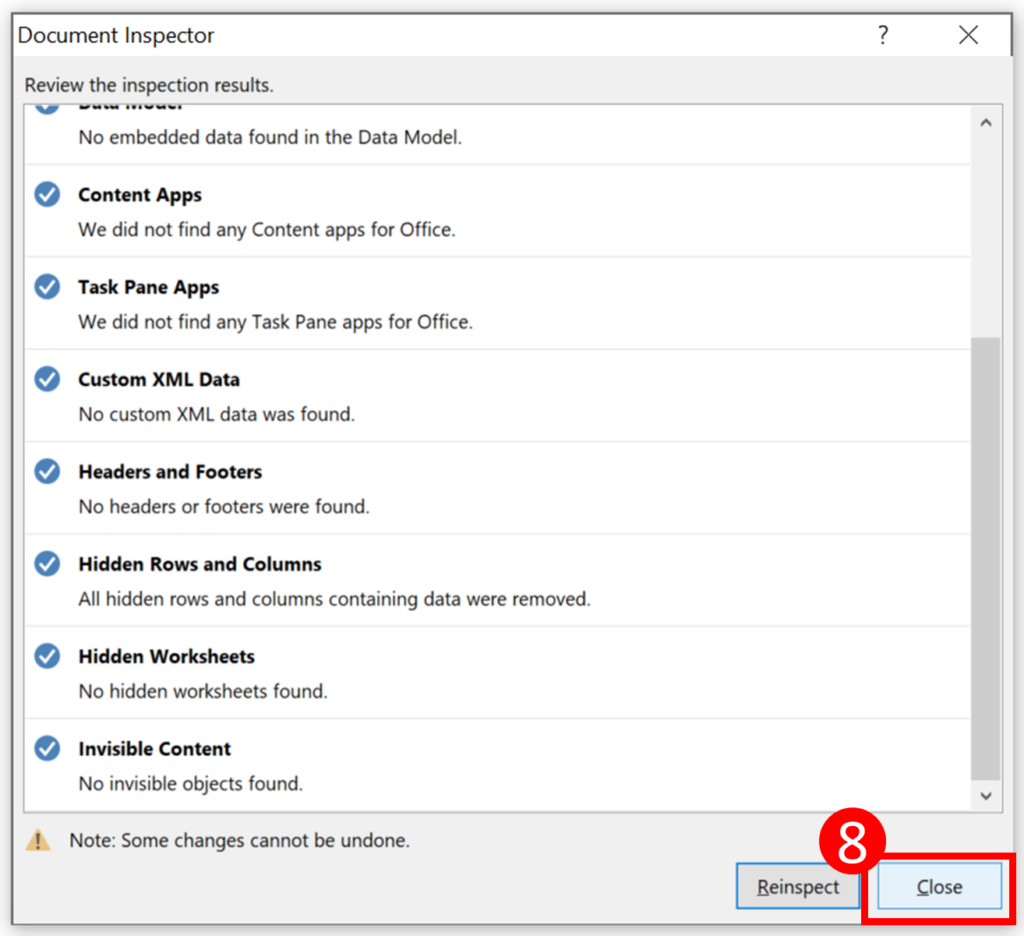
Step 8: Press “Close”
Step 7 may take a bit of time. After the removal is finished, a tick should appear next to “Hidden Rows and Columns”.
Result
There isn’t any hidden rows on the fruit list as a result.

You might also be interested in 6 Ways To Converting Text To Number Quickly In Excel
You might also be interested in How To Remove Digits After Decimal In Excel?
Hungry for more useful Excel tips like this? Subscribe to our newsletter to make sure you won’t miss out on any of our posts and get exclusive Excel tips!